The secrets of perfect crackling
Everybody loves crackling! The crunch, a little moistness, and then that hit of intense salty pork flavour is really difficult to beat. It may not be the healthiest, but sometimes you have to allow yourselves those little luxuries!
Getting crackling perfect is an art though, which needs to be balanced carefully with cooking the pork itself, to ensure that either is not under or overcooked, and you don’t end up with soft and chewy crackling, and overdone pork.
Each cut is different and will require different cooking, so there isn’t one method that will work for all recipes, which is why it is important to understand what makes good crackling, and the principles, so you can adapt it to your chosen recipe, and ensure perfect crackling every time!
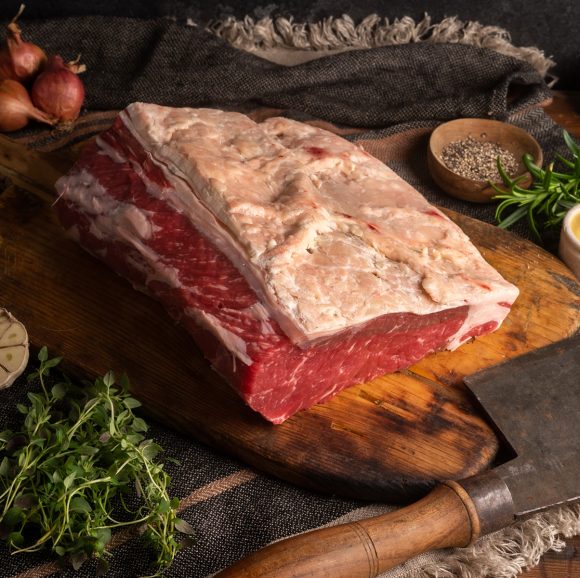
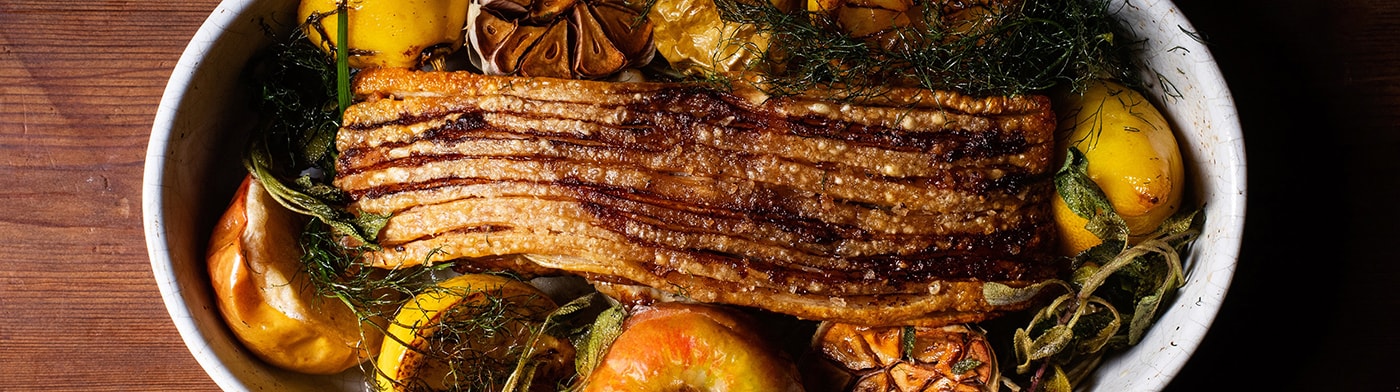
Crackling itself is simply the skin of the pork, with a thin layer of fat underneath. It can be made from any part of the skin covering any joint or cut, though belly, shoulder, leg and loin tends to provide the best results. The key points are that there is a nice dry rind, and a good layer of fat underneath, neither will work without the other. It is the fat which cooks the dry skin, and this will only work if it is dry.
Here are some important steps to follow;
Get the best pork you can buy
With a Dorset Meat Company joint, you are most of the way there! Out joints are well dried and hung already for at least 14 days, and shipped in butchers paper rather than plastic, so the skin will already be in good condition. You can tell the difference in quality by the deep colour of the skin, which shows it is well dried and perfect for crackling.
Dry the skin
Moisture is the one thing which will hold crackling back from doing it’s thing. So first thing, remove any packaging, dry off any moisture with a kitchen towel, and allow the joint to rest in the fridge until ready to cook. You can also dry the skin further with a hair dryer for even more dryness and a head start! Dry skin is an absolute must before you start. The drier the skin is, the darker and more translucent it will be, while wetter skin will be pale and opaque.
Score the skin
This is a crucial step, which allows the skin to breathe, and heat to reach the fat below, which then renders out and rises up through the skin to cook it. It also encourages the edges of the cuts to blister and bubble up for perfect puffy crackling. As you would expect with our attention and care, all of our joints are delivered with the scores already cut by our expert butchers, who know a thing or two about pork!
Cuts should be made about finger width apart, and with a sharp knife ( a Stanley knife is ideal) but make sure you don’t cut through the fat layer to the meat below, otherwise the juices will rise up and undo all your hard work. If you set the blade of the craft knife so that it protrudes just a half or one centimetre, this can help prevent you cutting too deep. Slicing carefully here does help when it comes to serving, as the pieces will split along your score lines.
Salt the rind
Gently rubbing fine sea salt in to the scores will help draw out more of the moisture, as well as adding seasoning too. But make sure you do this just before it goes in the oven, otherwise if left to rest the moisture which is drawn out will defeat what you are trying to achieve. You can add extra seasoning at this point, such as pepper, fennel seeds, thyme or rosemary for extra layers of flavour. Salt isn’t essential however if you are worried about salt intake.
Get it hot!
An initial hot blast is absolutely key to giving the crackling a headstart. 220°C, 230°C, maybe even more, at this stage of cooking the joint will be able to take it and not burn as the heat is transferred through the meat. Usually 30 minutes is a good time to aim for with this stage. As it is a short blast, it is unlikely to overcook or dry the joint itself, as the crackling is taking the brunt of the heat. Keep watching it to see the skin begin to puff, and once you are happy it is on it’s way, you can then turn down the temperature as the recipe requires, usually around 180°C. Remember that the crackling won’t be done at this stage, and will still be soft, but at least you will know it is cooking nicely. Then the remainder of the roast is the time that the crackling begins to crisp up as the fat renders out.
How can I tell if it is ready?
Give it a tap – if it feels hard and makes a sound it will be done, if it is soft, then it isn’t quite ready.
What if the joint is ready and the crackling isn’t?
This is a common problem, and the worst thing you can do is leave it in longer, as the meat will overcook, and there is no point in having perfect crackling and dry meat! The best thing to do is to carefully cut away the crackling from the joint, separating the meat layer and fat layer, so the fat stays with the skin. Then turn up the oven, ensure the skin is well basted, and roast skin side up on a baking tray until done.
Don’t be tempted to grill it or fry it, as the harsh direct heat won’t reach the skin evenly, so you will end up with dry burnt bits and soft chewy ones.
So there you go, the secrets to crispy crackling every time, and a few points to allow you to work out why your crackling might not be cooking as you wish, so you can make adjustments and get perfect results.
Order Meat Online – Free UK Delivery Available
Shop our range of high welfare 100% grass fed meat boxes and free range poultry. Get 10% off your first order with discount code ‘welcome10‘